
#3 Creating a Custom Modifier
Implementing a CardView modifier

Hello everyone and welcome back to learning SwiftUI,
I recently stumbled across an article by Danijela Vrzan where she goes through how to create a CardView modifier.
You can read her article here: SwiftUI Design: Create a card view.
I thought this article was really interesting and I have been spending very little time with ViewModifiers before. So I decided to play around with it to see what I could get out of it.
Here is the original code from her article:
struct CardBackGround: ViewModifier {
    func body(content: Content) -> some View {
        content
            .background(Color("CardBackground"))
            .cornerRadius(20)
            .shadow(color: .black.opacity(0.3), radius: 3)
    }
}

extension View {
    func cardBackground() -> some View {
        modifier(CardBackGround())
    }
}
As you can see, she created a ViewModifier and then an extension view so we easily can use that as a modifier on our objects.
The CardBackground color is set in the assets folder, notice there is a color set for dark mode as well. That is because if the user switches to dark mode, if we have set it to white, the card view will disappear.

Alright, it is time to test out the modifier. Here I have set up a view with some objects.
struct CustomCardView: View {
var body: some View {
VStack(spacing: 75) {
Text("Hello World!")
.font(.title)
.cardBackground()
Image(systemName: "house")
.font(.system(size: 50))
.foregroundColor(.green)
.cardBackground()
HStack(spacing: 10) {
Image(systemName: "star")
Image(systemName: "star")
Image(systemName: "star.fill")
Image(systemName: "star.fill")
Image(systemName: "star.fill")
}
.font(.system(size: 40))
.foregroundColor(.yellow)
.cardBackground()
}
.padding()
}
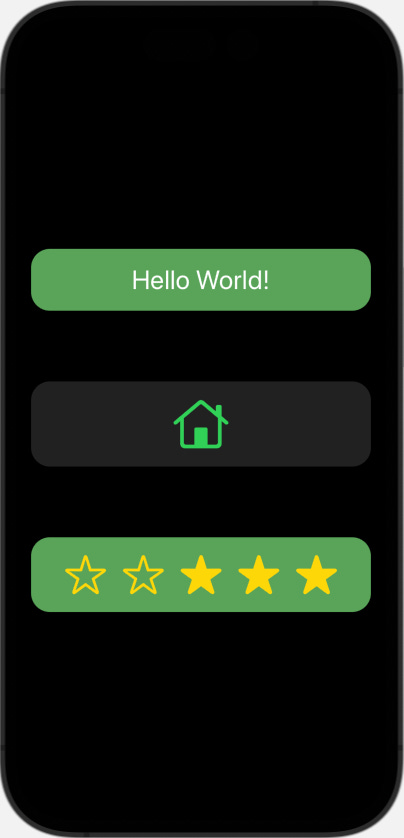
}Which gives us the following result:

As you may notice, it does not look nice. What I figured out is that we need to add some modifiers in our CardBackground ViewModifier. So let’s add a padding and a frame to it.
struct CardBackGround: ViewModifier {
    func body(content: Content) -> some View {
        content
            .padding()
            .frame(maxWidth: .infinity)
            .background(Color("CardBackground"))
            .cornerRadius(20)
            .shadow(color: .black.opacity(0.3), radius: 3)
    }
}
This gives a better result.

Want to learn about animating views in SwiftUI?
I created a book for anyone new to SwiftUI that want to develop their SwiftUI animation skills. The book will first cover the basics to then move on to more advance techniques. Check out the link:
Learning SwiftUI Animations - The Beginner Roadtrip
You could also add an animation to your card view if you’d like. Here I added a second color asset called “CardBackground2”, so when you click on an object it will toggle between the two colors.
struct CardBackGround: ViewModifier {
    @State private var animateCardColor: Bool = false
    func body(content: Content) -> some View {
        content
            .padding()
            .frame(maxWidth: .infinity)
            .background(Color(animateCardColor ? "CardBackground2" : "CardBackground"))
            .animation(.easeOut, value: animateCardColor)
            .cornerRadius(20)
            .shadow(color: .black.opacity(0.3), radius: 3)
            .onTapGesture {
                animateCardColor.toggle()
            }
    }
}

I still haven’t figured out how to implement “video” in a Substack post so you’ll have to try the code out in Xcode for yourself. Or you can check out the video at my Twitter.

That was it for this time. What do you think about this weeks post? Are there any other good use cases for ViewModifiers? If so, please share your experience in the comment section or let’s start a discussion on Twitter.
Thanks again for reading. Have a nice day!
Yours truly,
Mr SwiftUI