
Ratings are always a good indicator
How to create a rating view with SwiftUI

Want to learn how to create smooth animations in SwiftUI? Check out my book:
Learning SwiftUI Animations - The Beginner Roadtrip
Hello everyone,
This is issue #6 of Learning SwiftUI.
Hope you had a great week so far and that you have learned something new. I know I have, right now I am traveling home from a university reunion that I had with some old friends. One thing I take with me from this experience, I am not 20 anymore. But it sure was fun to catch up again to talk about good ol’ memories 😃.
This week I spent time going through some tutorials on Youtube and this rating view stuck with me. So I decided to share it with you.
This is what we will create in this issue:

To create this, not a lot of code is required. Which is one of the reasons I love SwiftUI.
Let’s start by setting up a @State property wrapper called rating and a ForEach loop for our star sf symbol. You might wonder why we have set up a ternary operator for the color of the stars, that is because we will add an animation later on.
struct RatingView: View {
@State private var rating: Int = 3
var body: some View {
VStack {
ForEach(1...5, id: \.self) { index in
Image(systemName: "star.fill")
.foregroundColor(index <= rating ? .yellow : .gray.opacity(0.5))
.font(.largeTitle)
}
}
}
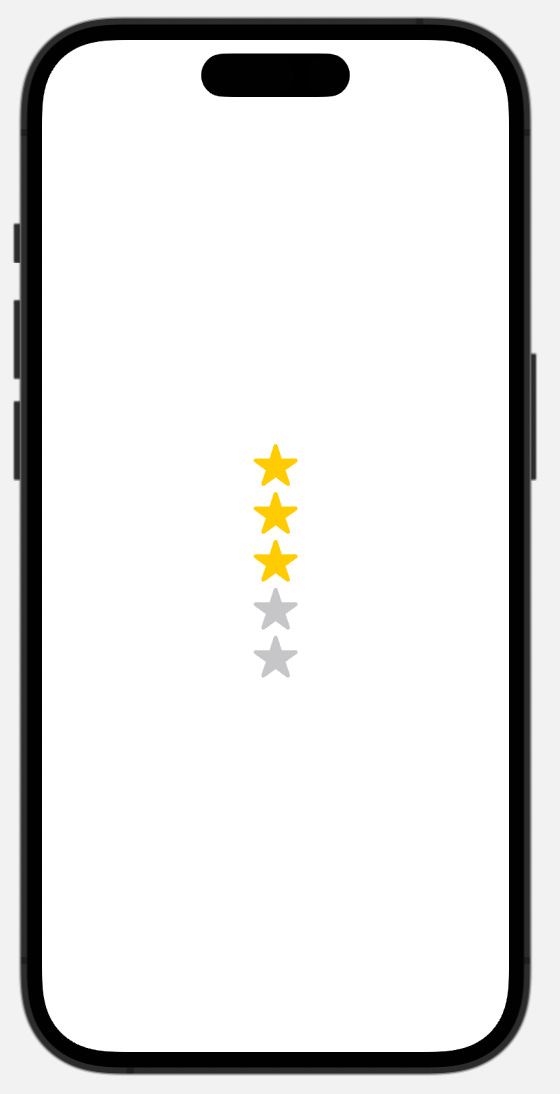
}Three stars are yellow since that is the starting number for our property wrapper. The rest of the stars will be gray as that is what we have set up in our ternary operator for the foreground color modifier. But as you can see in the picture below, this is not really a nice way to present a rating view as we have it in a VStack.
What we need to do next is to set our ForEach loop within a HStack. We also want to set up our rating in a text view, just for fun, so let’s do that as well. Add this code:
struct RatingView: View {
    @State private var rating: Int = 3

    var body: some View {
        VStack {
            HStack(spacing: 4) {
                ForEach(1...5, id: \.self) { index in
                    Image(systemName: "star.fill")
                        .foregroundColor(index <= rating ? .yellow : .gray.opacity(0.5))
                }

                Text("(\(rating))")
                    .fontWeight(.semibold)
                    .foregroundColor(.yellow)
                    .padding(.leading, 5)
            }
            .font(.largeTitle)
        }
    }
}
Want to learn more about SwiftUI animations?
I created a book for anyone new to SwiftUI that wants to develop their SwiftUI animation skills. The book cover the basics and more advance techniques to animating objects and views in SwiftUI. You can check it out by clicking the link below:
Learning SwiftUI Animations - The Beginner Roadtrip
Two minor examples from the book:

Now when we have added a HStack we can also add a spacing of 4, to spread out the stars a bit. You can use whatever spacing you like, that is up to you what you prefer. We also added a text view that will display the number of our property wrapper.

Now this looks much better, but as you may have noticed. Nothing really happens to the view as it is static, you can not change the rating in any way. So let's fix that by adding a stepper that is bound to our rating property wrapper and of course, since I love animations, we should add an animation as well since we already set up a ternary operator in the foreground color for the star images.
For final code should look like this now:
struct RatingView: View {
    @State private var rating: Int = 3

    var body: some View {
        VStack {
            HStack(spacing: 4) {
                ForEach(1...5, id: \.self) { index in
                    Image(systemName: "star.fill")
                        .foregroundColor(index <= rating ? .yellow : .gray.opacity(0.5))
                }

                Text("(\(rating))")
                    .fontWeight(.semibold)
                    .foregroundColor(rating == 0 ? .gray.opacity(0.5) : .yellow)
                    .padding(.leading, 5)
            }
            .font(.largeTitle)
            .animation(.easeIn(duration: 0.3), value: rating)

            Stepper("Give rating", value: $rating, in: 0...5)
                .padding()
        }
    }
}
Now if you run your code it should look as in the video in the beginning of this issue. I also added a color change on the text view so when the rating is 0, the text will be gray. Otherwise it will have the color yellow.
One thing I was thinking of while writing this issue, we could actually make the rating view better by adding the possibility to partly fill the stars so we can for example take a rating of 3,5 stars. Meaning it should be able to handle decimals. But I did not have time to figure that one out, so I will save that for another issue.
That was it for this time. Hope you enjoyed and found value with this issue. If you haven’t subscribed yet, please do. If you have any questions you can always comment here or DM me at twitter @SwiftUI_newbie.
Have a nice day!
Mr SwiftUI